

Unlock the Full Potential
This installation was on a 4-story home, and the tech had not yet gone to the basement to troubleshoot the “infinity” water source heat pump, as he was told he by the homeowner. He was in the attic at the infinity furnace above the 4th floor. He was getting his dcv in the proper range on his A and B green plug on the air handler, 3 to 4 vdc. His indoor board ohm reading was in range, 28k to 32 k. The tech ohmed out the A and B thermostat wires on the water source heat pump from the upstairs. His ohm reading was not in range of a normal infinity board. His reading was around 64.4k. The tech then made the long walk to the basement where the “geothermal heat pump” was located. Bingo.
Disclaimer: The technical statements, information and recommendations contained herein are believed to be accurate as of the date hereof, but Mingledorff’s does not make representations or warranties, express or implied, as to its accuracy, its completeness, or the results to be obtained. The information is being provided for informational purposes only and is intended for use by persons having adequate skill and expertise regarding the proper selection, use and application of the products and recommendations and at their own risk and discretion.

September 8, 2020
Setup Thermostat Part 2
Thermostat Setup
Technical Service Group would like to share the following information on thermostat setup of an Ion controller. Why should you know how to setup a controller? How you know someone has lockout temperature’s set incorrect. This is only one part of setting a controller up. Tech should Know how to check and know where to find each item.
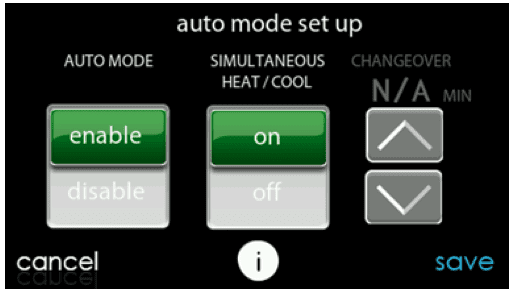
Step 1
Select Auto Mode. Then select save
Once the auto changeover option has been selected, touch SAVE.
Enable or Disable: Choose to enable or disable auto changeover mode. Default = Enable
NOTE: AUTO mode is intended to switch between Heating and Cooling modes based on temperature demand. A gradual auto transition is the energy–conscious default that will satisfy the majority of customers. Some customers might have significant and simultaneous heating and cooling demands in different zones. To address this need, a special simultaneous heating and cooling demand auto mode could be enabled by the Installer.
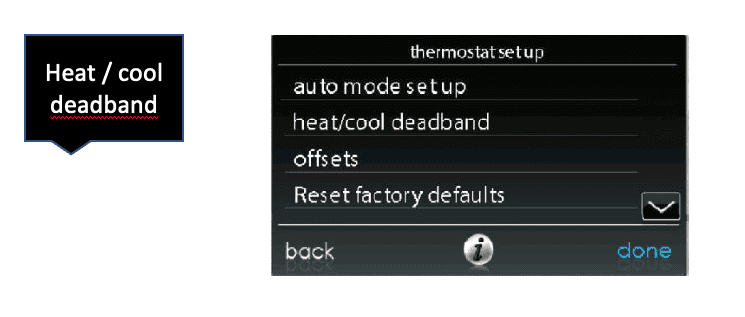
Step 2
Select heat/cool deadband then save
Heat/Cool Dead band
The minimum difference enforced between heating and cooling desired temperatures. The dead band does not change when the user changes between Fahrenheit and Celsius.
Ex: A 2° dead band will be 2°F or 2°C and does not change with units. This can allow one setting to “push” the other to maintain this difference. When the correct dead band is set, touch SAVE.
Dead band: Adjustable from 0 to 6; Default = 2.
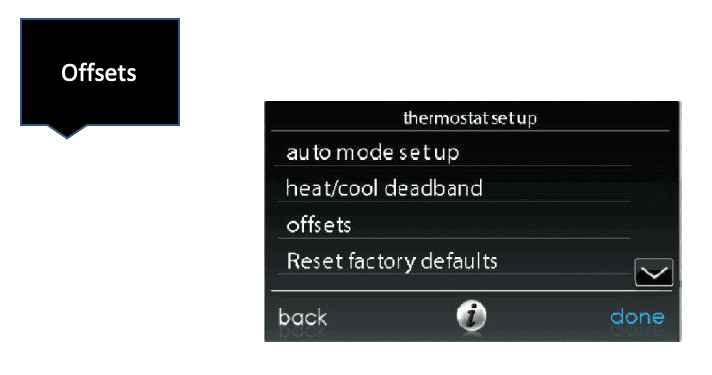
Step 3
Select Offsets then save
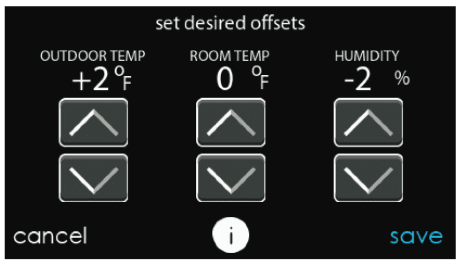
This option allows calibration (or deliberate mis-calibration) of the temperature and humidity sensors. These offsets are added to the actual temperature/humidity values. See also Zone Offsets Section. When the correct offsets are made, touch SAVE. If the system is non-zoned, the indoor temperature offset is found on this screen. If the system is zoned, the indoor temperature offset is found in the Zoning, Offsets screen.
Outdoor temperature: Adjustable from -5° to 5°F (-3° to 3°C). Default = °F
Indoor temperature: Adjustable from -5° to 5°F (-3° to 3°C). Default = 0°F
Humidity: Adjustable from -10 – 10%. Default = 0%
Step 4
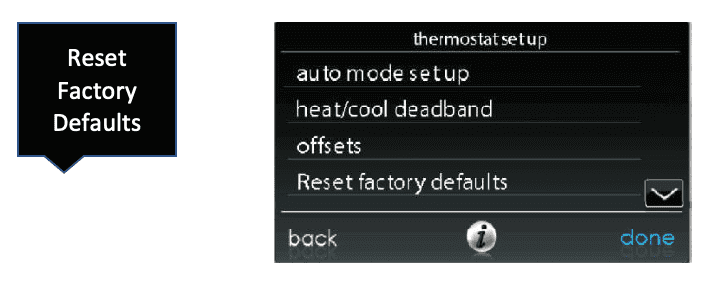
Select reset factory defaults then save
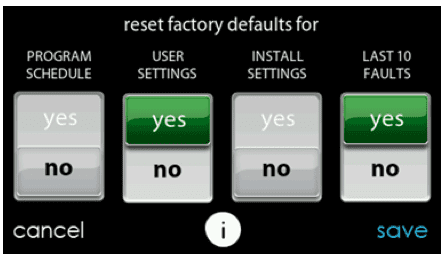
This option allows the installer to reset certain factory parameters. After the selections are made, touch SAVE.
Program Schedule: Reset back to pre-programmed time and temperature.
User Settings: Reset user settings back to pre-programmed values.
Install Settings: Reset installation settings back to pre-programmed values.
Last 10 Events: Reset the last 10 system events under the Service menu.
Step 5
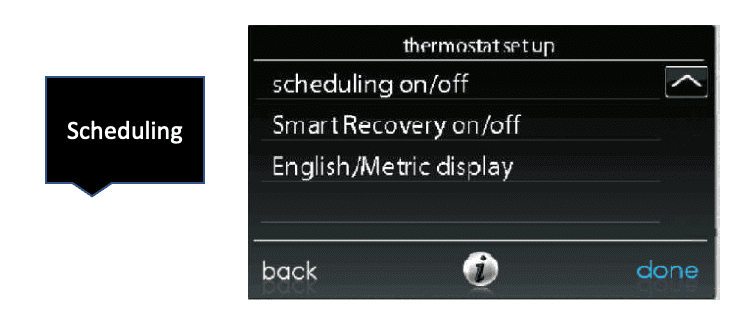
Select scheduling then save
This option lets the installer allow comfort schedule programming features. After the selection is made, touch SAVE.
Scheduling: On or Off. Default = On
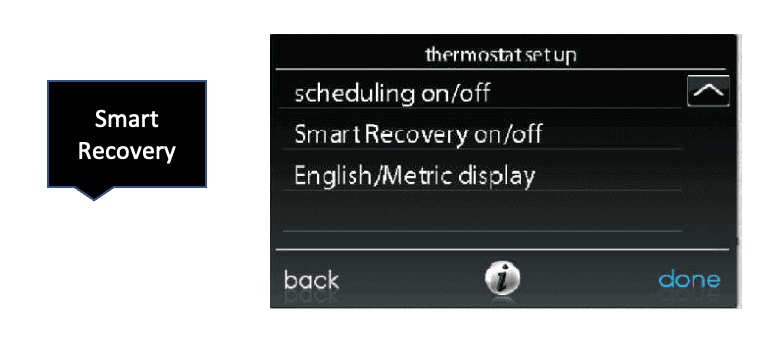
Smart Recovery refers to transitions between and among the Home, Sleep and Wake modes. Moving from the Away mode to any other mode is covered by the Smart Setback feature.
Smart Recovery applies to programmable operation only.
Smart Recovery causes the system to ramp the system target set points to those for the next programmed schedule period to help save energy during period transitions. Smart Recovery will start recovery 90 minutes prior to schedule change in both heating and cooling mode. After the selection is made, touch SAVE.
Smart Recovery: On or Off. Default = On
Select English then save.
After covering this information you will be able to setup a controller and know how to Check parameters.
Unlock the Full Potential
This installation was on a 4-story home, and the tech had not yet gone to the basement to troubleshoot the “infinity” water source heat pump, as he was told he by the homeowner. He was in the attic at the infinity furnace above the 4th floor. He was getting his dcv in the proper range on his A and B green plug on the air handler, 3 to 4 vdc. His indoor board ohm reading was in range, 28k to 32 k. The tech ohmed out the A and B thermostat wires on the water source heat pump from the upstairs. His ohm reading was not in range of a normal infinity board. His reading was around 64.4k. The tech then made the long walk to the basement where the “geothermal heat pump” was located. Bingo.
More to Explore

Heat Pump
Keep up with the latest HVAC news from Mingledorff’s Inc.