
Unlock the Full Potential
This installation was on a 4-story home, and the tech had not yet gone to the basement to troubleshoot the “infinity” water source heat pump, as he was told he by the homeowner. He was in the attic at the infinity furnace above the 4th floor. He was getting his dcv in the proper range on his A and B green plug on the air handler, 3 to 4 vdc. His indoor board ohm reading was in range, 28k to 32 k. The tech ohmed out the A and B thermostat wires on the water source heat pump from the upstairs. His ohm reading was not in range of a normal infinity board. His reading was around 64.4k. The tech then made the long walk to the basement where the “geothermal heat pump” was located. Bingo.

November 17, 2022
Because I was Inverted
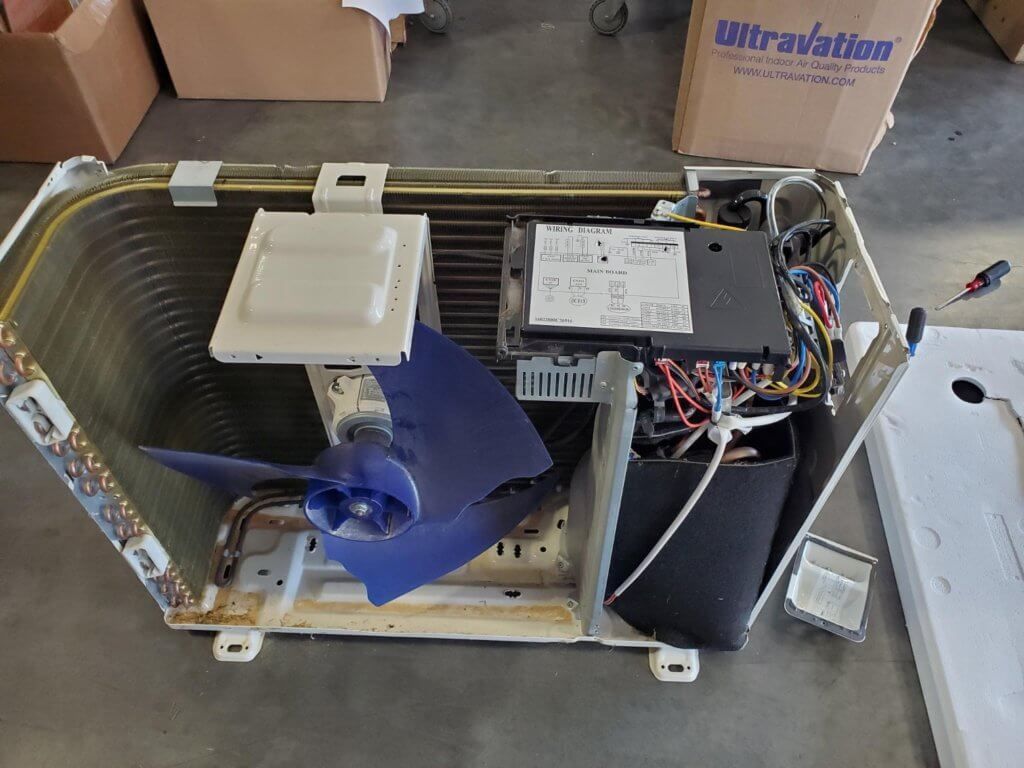
For this article, I will explain how to replace the main control board on a 38MARB ductless outdoor unit. The boards are inverted or upside down in most ductless outdoor units.
The 38MARB board has a heat sink under the board that you cannot see with a refrigerant loop running through the heat sink. At first glance, it looks easy to replace, and it is; however, if you do not know about the hidden screws you could damage the refrigerant loop when trying to remove the board.
Start by removing power to the unit and confirming with a meter. Remove the top cover and the fan side cover exposing the board, fan, and compressor section.


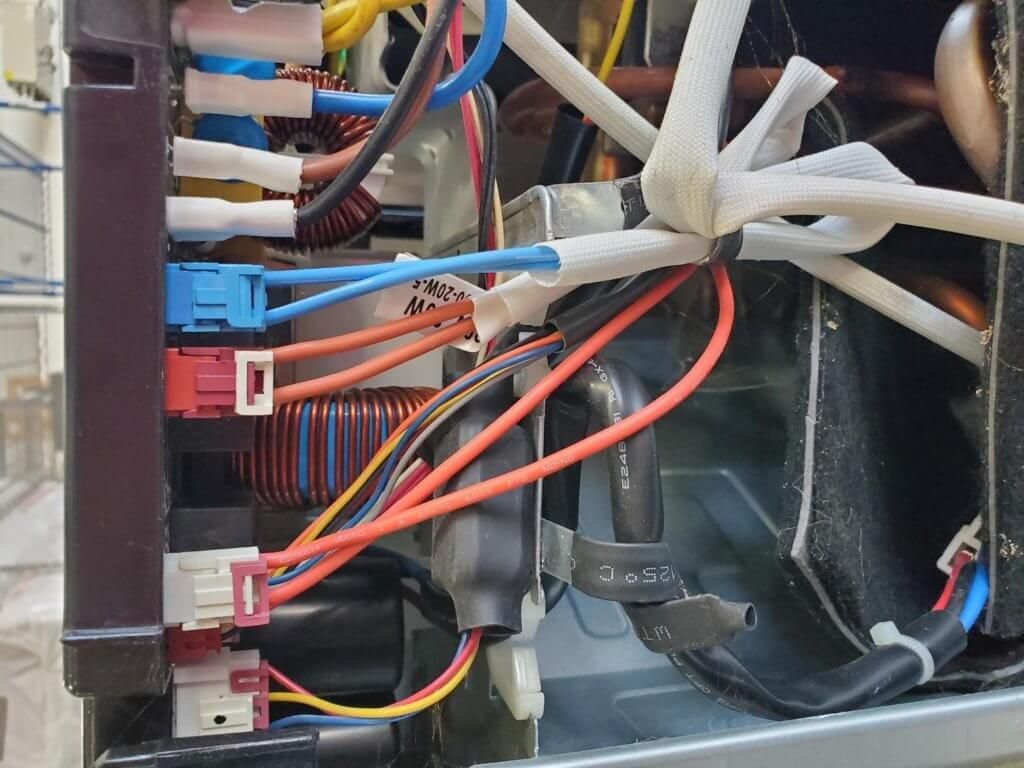
Then remove the wires from the board (this will help when it is time to flip the board over). Next, find the pigtail for the compressor harness and disconnect.

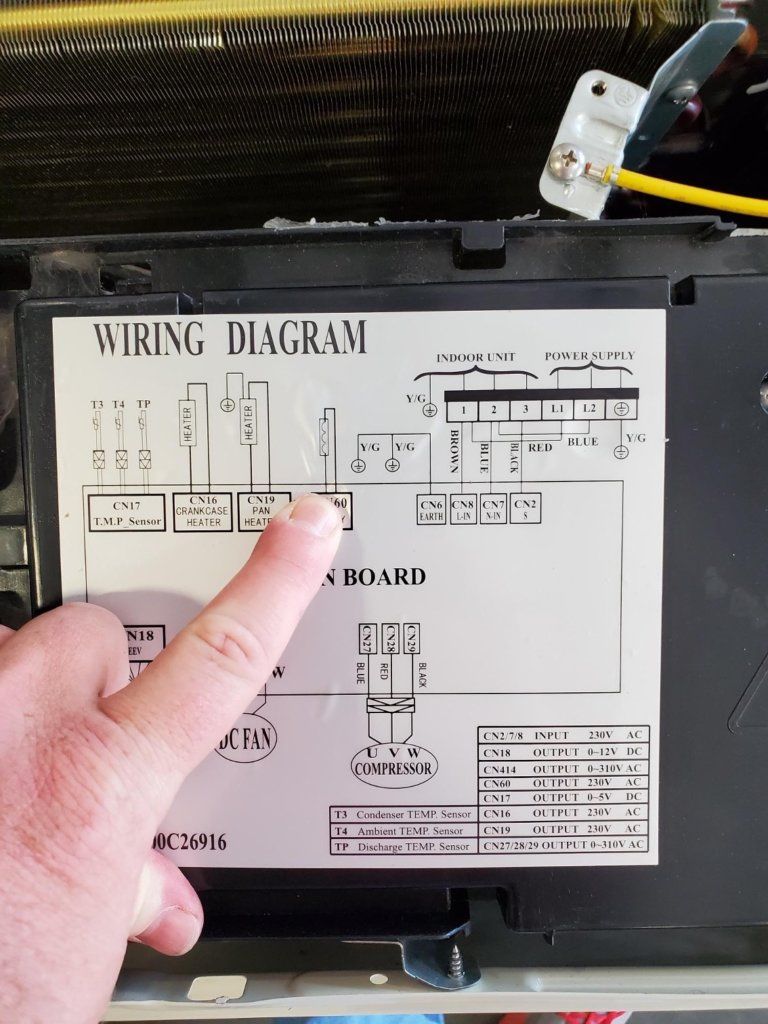
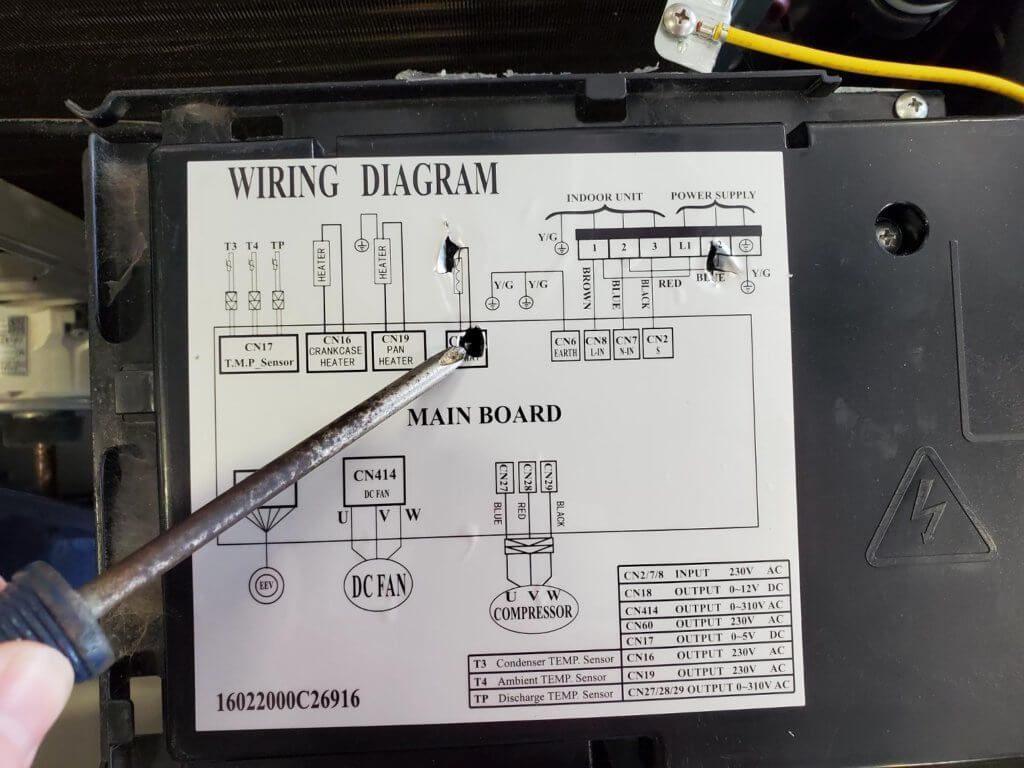
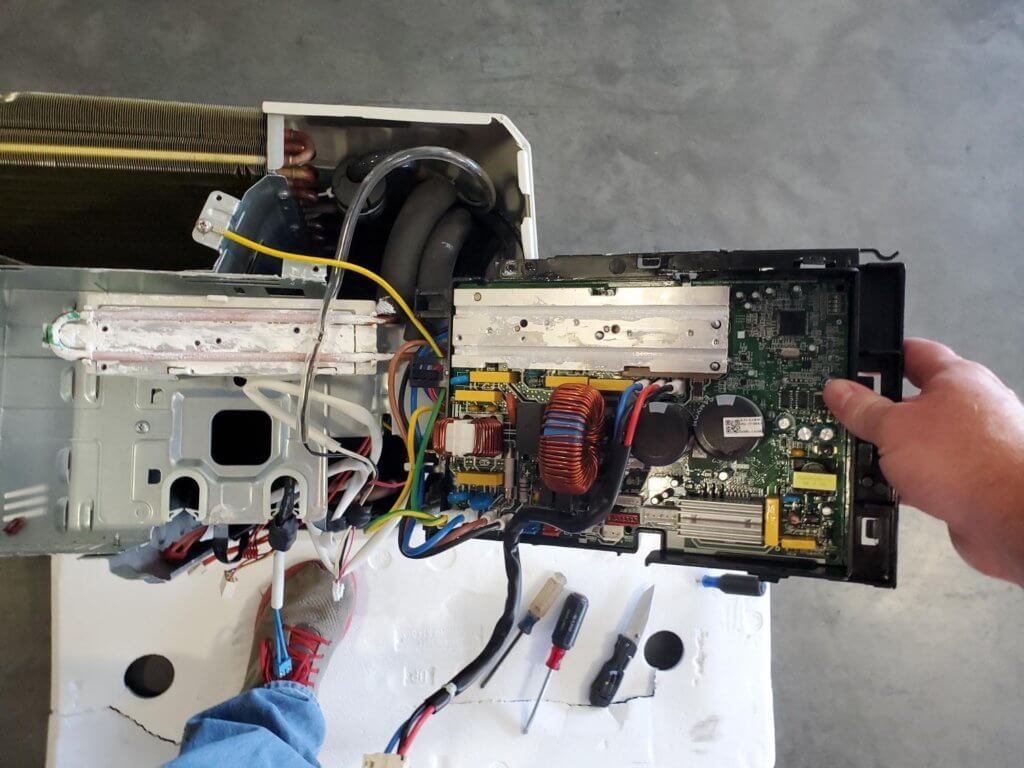
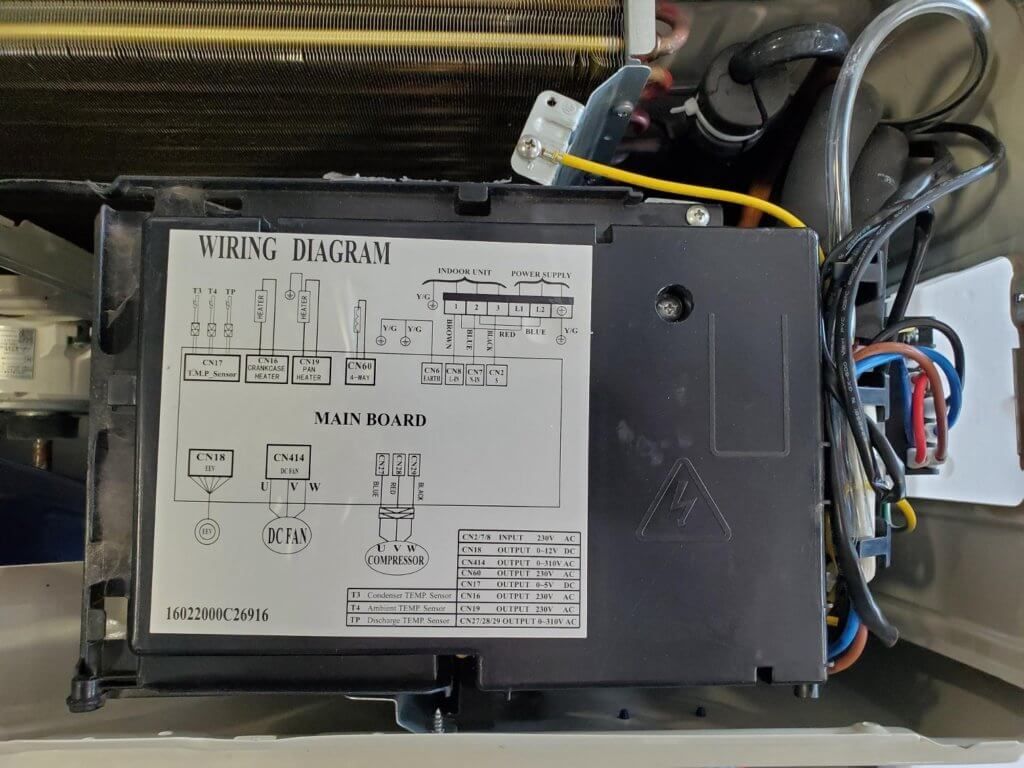
Next, locate the wiring diagram on the board. Once located, take your finger and move it around the board feeling for round holes under the diagram. There are four screws holding the heat sink to the board and three are under the wiring diagram. It is best to insert a #2 Philips head screwdriver through the thin wiring diagram and remove the screws.


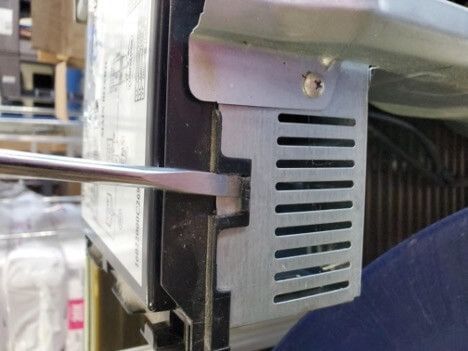
Once all four screws are removed, locate the small plastic clips on the front and back of the board and gently release with a flathead.

Simply lift straight up off the heat sink and lay it to the side where the copper and electrical are located. Finish removing the remaining wires and start the new board installation. Remember to add new heat sink paste to the heat sink. If this is not completed the new board may not last long.

Install the new board, assemble the unit, restore power, and check for normal operation.
Unlock the Full Potential
This installation was on a 4-story home, and the tech had not yet gone to the basement to troubleshoot the “infinity” water source heat pump, as he was told he by the homeowner. He was in the attic at the infinity furnace above the 4th floor. He was getting his dcv in the proper range on his A and B green plug on the air handler, 3 to 4 vdc. His indoor board ohm reading was in range, 28k to 32 k. The tech ohmed out the A and B thermostat wires on the water source heat pump from the upstairs. His ohm reading was not in range of a normal infinity board. His reading was around 64.4k. The tech then made the long walk to the basement where the “geothermal heat pump” was located. Bingo.
More to Explore
Heat Pump
Keep up with the latest HVAC news from Mingledorff’s Inc.